Scalable Web Application

Best Practices for Building a Scalable Web Application

No one likes a web app that crashes just when things start getting exciting. Whether you’re running a SaaS startup, scaling your eCommerce platform, or building internal tools that your whole team depends on, your web app has to grow with you. Period. 

Today we will discuss the best practices for building a scalable web application from the ground up. From choosing the right tech stack to future-proofing your backend and managing traffic spikes like a pro, you can find this your go-to guide. Keep your app stable, smooth, and growth-ready in 2025 and beyond.

Why Scalability Isn’t Optional Anymore

Users expect lighting-fast load times, 24/7 availability, and zero glitches, no matter how many people are online or how wild your latest product drop gets. If your app can’t keep up, they bounce. And when they bounce, they don’t come back.

Scalability is what separates apps that survive from ones that thrive. It’s your app’s ability to gracefully handle more users, more data, and more complexity – without freaking out or crashing. Think of it as your system’s built-in stress management. The more scalable your app is, the better it performs when it matters most.

Not convinced? Check this: According to Gartner, downtime costs businesses over $300,000 per hour. And that’s not even a typo. Whether it’s your checkout pages freezing during a flash sale or your dashboard breaking when new users pile in, an unscalable app isn’t just annoying – it’s expensive.

Remember Ticketmaster controversy over Taylor Swift’s pre-sales ticket meltdown or airline websites that buckle under holiday traffic. One crash can snowball into lost revenue, customer churn, and a PR nightmare.

What Makes a Web Application Scalable?

So, what does it actually mean for a web application to be scalable? Is it just about handling more traffic? Faster load times? Never going offline?

Well, there’s more to do. Let’s unpack this and minus the tech jargon overload.

Scalability vs. Performance vs. Availability

These three often get mixed up, but they each play a different role in how your web app behaves:

  • Scalability is your app’s ability to grow – whether that’s in traffic, features, or data, without needing to be rebuilt from scratch. 
  • Performance is how fast and responsive your app is right now, no matter how many users are on it. A scalable app still needs to be fast at every stage.
  • Availability is about uptime. Can users access your app when they need it? Even during peak hours or maintenance?

In nutshell:

  1. Great performance makes users happy.
  2. High availability builds trust.
  3. Smart Scalability ensures both keep happening – even as your user base grows.

Horizontal vs. Vertical Scaling

Let’s say your app is like a coffee shop.

  • Vertical Scaling is upgrading your espresso machine to a bigger, faster one. You’re adding more power to a single system. It’s easier to start with, but there’s a ceiling – you can only go so big before it breaks the bank.
  • Horizontal Scaling is hiring more baristas and opening more counters. You’re spreading the load across multiple systems. It’s a bit more work to manage, but it’s how the big players do it.

Most modern apps aim for horizontal scaling, especially when built on cloud platforms. It’s more flexible, cost-effective, and future-proof.

Real-World Examples: Good vs. Bad Scalability

So, here we will be a little practical:

Good Scalability Example:

We all know Shopify handles millions of Black Friday orders without a hiccup. Why? Because they’ve built their platform on a distributed architecture that scales horizontally. More traffic? They just spin up more instances, No panic, no downtime.

Bad Scalability Example:

Remember when Clubhouse went viral and suddenly… no one could get in? Their backend wasn’t ready for the spike. The buzz was there- but the infrastructure wasn’t. By the time they scaled up, the hype had moved on.

The lesson? A brilliant idea or a beautiful UI means nothing if your app can’t handle growth.  Scalability isn’t just a technical checkbox. It’s a business enabler. It means your app is ready for opportunity, prepared for surprises, and built for the long game.

Best Practices for Building Scalable Web Applications

The main question of all discussion is: How do you actually build a scalable web app?

Honestly saying, you can’t afford to guess your way through infrastructure decisions or throw money at more servers every time things get slow. Scalability starts with smart planning, clean architecture, and the discipline to think long-term, even when you’re in the MVP mode.

Below are the best practices that high-growth companies swear by when building web applications that are reliable under pressure, cost-effective at scale, and easy to evolve without breaking everything.

Let’s break it down:

4.1 Design with Scalability in Mind

Good scalability starts at the whiteboard stage. If your architecture is tightly coupled and tangled, adding more features (or users) later feels like stacking Jenga blocks during an earthquake.

Best Practice:

  • Modular Architecture: Build components that do one thing well and don’t depend too heavily on each other. This makes your app easier to debug, scale, and maintain.
  • Microservices or Service-oriented Architecture: Instead of a single, bulky application, break it into small, independent services that talk to each other through APIs.
  • API-first Design: Treat every function in your app like a service – even internal ones, so you can plug and play across platforms without extra plumbing.

Example:

Amazon’s storefront is a masterclass in microservices. Every “Buy Now” button, review box, and recommendation panel is its own little service – so they can test, deploy, or scale them individually without touching the rest.

4.2 Choosing The Right Tech Stack

The tools you use shape your app’s growth potential. If you choose flashy tools just because they’re popular right now without thinking long-term, it might cause serious problems when you actually try to scale your app.

Best Practice:

  • Lightweight Frameworks: Go for tools that are proven, fast, and scalable. Next.js, FastAPI, Spring Boot – clean, lean, and built for speed.
  • Match Your Language and Database to the Job: Consider Golang for performance-heavy microservices, Python for AI, or Node.js for real-time APIs. Don’t use SQL if your data doesn’t fit into neat tables—sometimes a flexible NoSQL database like MongoDB is just a better match.
  • Plan for Growth Early: Will this tech still work if your user base grows 10x? Will you find devs who know how to maintain it? These things matter.

Example:

Uber moved parts of its architecture from Node.js to Go when it faced performance bottlenecks in its geolocation and high-throughput systems. Why? Because Go handles concurrency better and offers lower latency. It helped Uber scale up real-time matching between drivers and riders without the system lagging under pressure.

4.3 Optimize the Backend Infrastructure

Backends aren’t attractive, but they’re what make or break performance. An overworked server and a single point of failure can take down your whole app.

Best Practices:

  • Use Cloud-native tools: Don’t reinvent the wheel. AWS, Azure, and GCP offer battle-tested, scalable components for everything from storage to messaging.
  • Containerize Everything: Docker lets you ship apps in neat, isolated boxes. Kubernetes helps you manage them at scale.
  • Enable auto-scaling & load balancing: Use built-in tools to distribute traffic evenly and auto-add instances when usage spikes.

Example:

Shopify handles massive Black Friday traffic surges using containerized services that auto-scale. One second it’s calm, the next it’s a tsunami—and they’re ready.

4.4 Efficient Database Strategies

Your app’s database is usually the first thing to cry for help under load. Poor data modeling or a lack of caching = instant bottleneck.

Best Practice:

  • Choose the right data model: SQL for structured, relational data. NoSQL for fast, flexible documents. NewSQL if you want the best of both.
  • Implement caching: Use Redis or Memcached to handle frequently accessed data without bothering the database every time.
  • Shard & replicate smartly: Split data across servers (sharding) and make backup copies (replication) to improve read/write efficiency.

Example:

Instagram shards its database across hundreds of servers so that no single one gets overwhelmed as its user base explodes.

4.5 Front-End Optimization

Your backend might be on rocket fuel—but if the front-end bloated and sluggish, users will never stick around to see the magic.

Best Practice:

  • Code splitting: Break large JS bundles into smaller chunks that load only when needed.
  • Lazy loading: Only load media and elements when the user scrolls to them.
  • Use CDNs: Serve static content from edge servers closest to the user for faster delivery.

Example:

Pinterest boosted user engagement by splitting its React app into micro-bundles and pushing assets through a global CDN.

4.6 Performance Monitoring & Load Testing

You can’t scale what you can’t see. Real-time insight into app behavior is key to fixing issues before users feel them.

Best Practice:

  • Use APM tools: Platforms like Datadog or New Relic help you spot slow endpoints, memory leaks, and service errors in real-time.
  • Run load tests regularly: Simulate user surges to see what breaks and fix it proactively.
  • Error tracking & alerts: Set up automated alerts so issues don’t sit in the logs unnoticed for days.

Example:

Slack’s team relies on constant monitoring and chaos drills to keep service reliable, even during massive growth phases.

4.7 Security & Compliance at Scale

As you grow, so does your attack surface—and your legal responsibilities. Security should scale with your app, not after it.

Best Practice:

  • Enforce role-based access: Limit access to only what’s necessary per role—interns don’t need admin keys.
  • Secure APIs and encrypt everything: Use HTTPS, manage secrets securely, and rotate tokens regularly.
  • Respect data laws: Make sure your stack supports compliance with regulations like GDPR, HIPAA, or India’s DPDP Act.

Example:

Fintech companies now design region-specific data clusters to ensure compliance with strict sovereignty laws—and avoid massive fines.

4.8 Budget-Smart Scalability

Scaling doesn’t have to mean overspending. The smartest companies grow efficiently, not just aggressively.

Best Practice:

  • Use spot instances and autoscaling: Save costs by using discounted capacity for non-critical tasks and auto-adjusting resources based on real-time demand.
  • Adopt FinOps principles: Build a culture where engineering and finance work together to balance performance and spend.
  • Eliminate waste: Shut down idle environments, track cloud usage, and kill zombie resources.

Example:

Mubi, a film streaming platform, cut nearly 30% of its cloud bill by running reports on spot instances and powering down unused test servers overnight.

Final Thoughts: Build Once, Scale Always

We have discussed that scalability isn’t about handling traffic. It’s about building web applications that grow with your business, not against it. From smart architecture and tech stack choices to database strategy, front-end performance, and ongoing monitoring, it all adds up to an app that’s reliable, efficient, and ready for whatever comes next.

At Oriental Outsourcing, we help businesses design and develop scalable web applications that are built for the long haul, whether you’re starting from scratch or reworking what’s already live.

Thinking about how well your current app can scale? Let’s talk!

Business Name

Efficient Tips for Selecting a Business Name -2

A good name for a company is always an added advantage even though it can perform well in the market. The name of the brand will communicate something to the customer directly or indirectly. The need for a good name for a brand has originated from the customer to identify, remember, discuss, and compare with other brands in the market. A right brand name can bring you a chunk of customers. Similarly, a bad name can fail to connect with the customers. For some people choosing the brand name is a simple task that is done very quickly without much difficulty. Here are some tips listed down below to be followed for a winning brand name.

Avoiding Tough Spelling Names

Don’t confuse your customers for finding your business online. For example, “Flickr” is a photo-sharing site that is misspelled frequently by users. Always keep your brand name simple for customers to memorize and find in web searches.

Don’t Pick Names That Limit Your Brand Growth

Naming brands with some narrow names may stop their growth after some time. Just think if Jeff Bezos has named his e-commerce as “Online Book Store” instead of “Amazon”. It would have stopped other companies to sell their products on amazon as it is an online bookstore. Never limit your brand to any specific product or region.

Getting the “.Com” Domain Name

Always choose the .com domain name for your business instead of .net, .org, .biz, or other possible domain extensions because it provides security. Many people like to be associated with the .com domain. The domain you need is already owned by someone willing to sell at the right price.
A good .com domain name is always a good investment for any business. Check websites like GoDaddy.com or NetworkSolutions.com for the required domain name. If it is not available then using the tool “Whois” can track the status of the user when they are willing to sell the domain name. Always make sure that your brand is popular on social media websites like Facebook, Instagram, Twitter, etc.

Using Meaningful Names

Choose a name that has a meaning which can spread positive energy among people relating to the business. Names “Google”, “Yahoo”, “Instagram” have come catchy appeal to the users but they are costly compared to other counterparts. Some simple, clear, and intriguing domain names include onlinetickets.com, foodelivery.com, and movietickets.com which are meaningful and can be easily related to the mind of the customers and easy for SEO.

Conducting a Proper Trademark Search

If you are starting a business in the USA check https://www.uspto.gov/ if you can get a trademark or a service mark for your desired business name. If you want to obtain a trademark in other countries check with their trademark issuing authorities for their procedure.

Assessing the Catchiness of the Business Name

No one wants a name that seems boring to the customers. At the same time, it must also not be difficult to spell for anyone and everyone. All the employers should say the name without any hesitation or difficulty and it should resonate in the mind of the customers.
Business Name Tips

Getting the Feedback of the Chosen Brand Name

Make a list of 10 names and get feedback from people like your friends, family, neighbors, and some other random people. Drop the names which receive more negative reviews from people. Also, make sure that the brand name doesn’t have any negative meaning in any known language.

Making Sure That the Brand Name Sounds Good

Some names seem to look good on paper but when they are said aloud they may seem a bit strange or awkward sometimes. People must be clear about the name they spell.

Making Sure About Satisfaction

People may suggest several names but you are the one who is supposed to be satisfied with the name in the first place. Never rush with the name if you don’t like it even though a large group of people recommend it. Your satisfaction should be a priority when it comes to business.
We hope these pointers will help you in choosing the right business name and make the processing load a bit lighter.

Guide for Creating an API Using Node.js

The buzz around application programming interfaces (APIs) is widespread, and for good reason. APIs provide a software interface that simplifies communication between two applications, a crucial aspect for achieving scalability and reusability. It’s increasingly common for proprietary web applications or services to include public APIs, allowing other developers to efficiently integrate features such as social media logins, credit card processing, and performance tracking.

In this blog, we will walk you through a thorough, step-by-step process of creating an Node.js API from scratch.

How to Create an API Using Node.js?

Node.js, a widely used JavaScript runtime powered by Chrome’s V8 JavaScript engine, has emerged as a prominent platform for creating server-side applications and APIs. APIs, which stand for Application Programming Interfaces, act as bridges that enable different software systems to communicate and interact with each other.

What is Rest API?

A REST (Representational State Transfer) API, commonly known as a RESTful API, is an architectural style used in the design of networked applications. It encompasses a set of principles and restrictions that dictate how resources are defined, structured, and accessed on the Internet.

In a REST API, resources are the central components that are made accessible and manipulated. A URL (Uniform Resource Locator) or URI (Uniform Resource Identifier) serves as a unique identifier for each resource. These resources can represent entities like users, products, posts, or any other type of data.

REST APIs are built upon a client-server model, where the server communicates with the client (for example, a web browser or a mobile app) by employing standardized HTTP methods such as GET, POST, PUT, DELETE, and more. These methods play a pivotal role in carrying out operations on the available resources, enabling tasks like retrieving data, creating new resources, updating existing ones, and deleting resources.

Setup of Node js

Setting Up the Development Environment for Node.js

1. Installing Node.js and npm

Installing Node.js and npm is the initial step in creating a Node.js API. Node.js serves as a JavaScript runtime for executing server-side JavaScript code, while npm, or Node Package Manager, streamlines the process of installing and managing Node.js packages.

To install Node.js, you should start by visiting the official Node.js website and obtaining the installer appropriate for your operating system. After the download, run the installer and carefully follow the on-screen instructions.

Once the installation is finished, you can verify whether Node.js and npm have been successfully installed on your system. You can do this by opening a terminal or command prompt and running the commands node -v and npm -v. If you see the versions of Node.js and npm displayed, it confirms the successful installation.

2. Initializing a Node.js Project

After installing Node.js and npm, you can initialize a Node.js project by following these steps:

1. Go to the specific directory in your terminal or command prompt where you plan to create your project.

2. Run the command “npm init” to initialize your project.

3. This command will interactively request project information like the package name, version, description, entry point, and more.

4. You can either input the required details or simply press Enter to accept the default values.

5. Once you’ve provided the necessary details or accepted the defaults, a file named “package.json” will be generated in your project directory.

6. The “package.json” file functions as a repository for metadata about your project and also compiles a list of the project’s dependencies.

By following these steps, you can easily establish a Node.js project and manage its configuration through the “package.json” file.

3. Installing Express.js Framework

Express.js, a popular web application framework for Node.js, simplifies the process of creating APIs and web applications. To add Express.js to your project, simply run the command npm install express in your project directory.

This command fetches the Express.js package from the npm registry and automatically adds it as a dependency in your package.json file. Additionally, it creates a node_modules directory in your project folder to house the installed packages. By following these steps, you can seamlessly incorporate Express.js and improve your web development workflow.

Now that you’ve successfully installed Express.js, you can begin harnessing its robust features and capabilities to construct your API. To integrate Express.js into your JavaScript files, simply utilize the ‘require’ keyword. From there, you can proceed to create routes, handle requests, and implement various middleware functions to enhance the functionality and performance of your API.

By establishing your development environment correctly, you’ve established the groundwork for building your Node.js API. The installation of Node.js and npm ensures you have the essential runtime and package management tools, and initializing a Node.js project and adding Express.js provides the structure and framework necessary for efficiently developing your API.

Steps to Create an API with Node.js

Here are the steps to build an API with Node.js:

Step 1: Project Setup

  • Start by creating a fresh directory dedicated to your project.
  • Now, open your terminal and go to the project directory.
  • Kickstart a new Node.js project with the following command: npm init

Step 2: Install dependencies

You can install the necessary dependencies by executing the following command: Use the command npm install express body-parser to install the required package

Step 3: Create the server file

  • Generate a new file within the project directory, for instance, name it server.js.
  • At the beginning of the file, import the necessary modules by including them.
Set up server

Create an instance of the Express application:

Express file

Add middleware to parse incoming request bodies:

Define Route

Define the routes for your API. 

  • Start the server and listen on a specified port:
Start Server

Step 4: Run the server

  • Open the terminal and navigate to the project directory.
  • Initiate the server by running the command: node server.js.

That’s all there is to it! You’ve now created a fundamental REST API with Node.js through Express. You can further enhance your API by including additional routes, connecting with databases, implementing authentication, and managing request payloads based on your requirements.

Conclusion

Creating a Node.js API involves several key steps, such as establishing endpoints, utilizing Node.js and Express, performing thorough testing, and deploying to a server or cloud environment. By implementing continuous integration and continuous deployment (CI/CD), you can optimize the development process. This method assures the creation of dependable and effective Node.js APIs that meet user needs and contribute to the growth of your business.

Cost For Website

How Much Does Creating a Website Cost

The website development and design depend on your budget and goals. Today, we are going to discuss how much it costs to build a website for most people.

What Tools Do You Need to Build a Website?

For building a website you don’t always need a professional web developer. Even if you are not in the field of web application development you can still build a website with the free tools available on the internet. There is a big chance of spending way more than the necessary budget on web development services.

For any website these are the tools you’ll always need for setting up the website:

  • The Domain Name (e.g. Google.com, IsItWP.com)
  • Website Builder (e.g. WordPress, Wix, Weebly)
  • Web Hosting (depending on your website builder)

Domain Name

The domain name is the name of the website such as Facebook.com, Linkedin.com, Microsoft.com, etc. People access the website by typing the name in the address bar. The name is valid for a year and you have an option to renew it post this timeframe. 

Website Builder

If you are a beginner or an intermediate developer, you need a website builder for making a website. It helps to create a great website as per our desired expectations which enables us to add features like SEO tags, plugins, etc. without much effort. While building a website, it is always recommended to use WordPress. It offers various features to enhance the website as per the requirements in turn giving total control over the website.

Website Process

Web Hosting

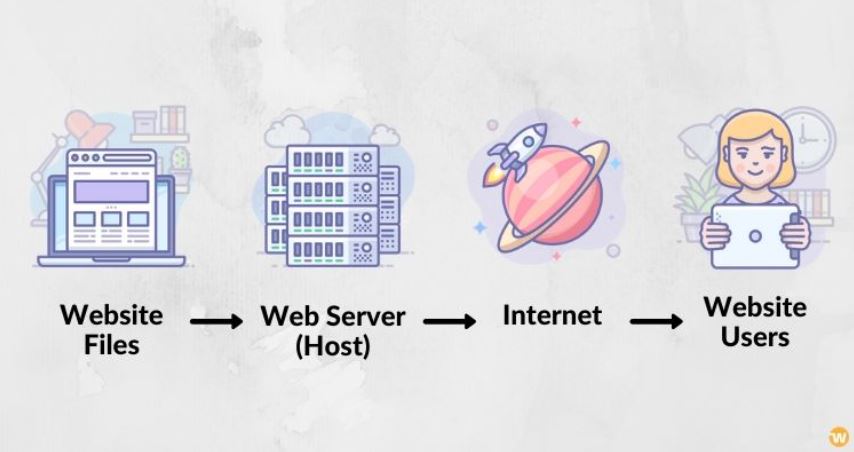
The home of the website where you store the files and content is called web hosting. When a user tries to access the website by typing the name of the domain in the address bar then the files stored on the web hosting server are accessed. Renting out the computers or servers and ensuring internet connectivity when the website is live is referred to as web hosting.  Shared hosting, VPS hosting, WordPress hosting, blog hosting, dedicated hosting, etc, are examples of various types of web hosting services.

The different budget categories of websites are as follows :

  • Building a small website with a minimal budget
  • Building an advanced website with more features
  • Building an online store
  • Building a custom-built website

How Much Does Building a Typical Website Costs You?

This type of website development costs somewhere around $100 and $500. For a feature-rich, customized website, it can range from about $30,000 or even more. For building a small website, you’ll need to have a well-defined budget for the domain name and web hosting services. The domain costs you somewhere around  $14.99 per year and the web hosting around $7.99 per month respectively. To sum up, for starting a website it costs around $110.87 annually at the minimum. The total cost of domain name and hosting will be very expensive for you, especially if you’re just in the starting phase.

In the world, Bluehost is one of the largest hosting companies, if you wish to consider one. Along with the WordPress community since 2005, and they are an officially recommended hosting provider by WordPress.org. For more details, the Bluehost review can be checked before proceeding. You can always save money by opting for annual plans instead of monthly.

You can choose free WordPress themes and plugins from the WordPress repository for saving costs.

The list of essential plugins can be downloaded for free from WordPress.org:

  • WPForms lite: Building a contact form
  • MonsterInsights: Connecting your site to Google Analytics
  • Yoast SEO: Improving your WordPress SEO (search engine optimization)
  • UpdraftPlus: Backing up your WordPress site
  • W3 Total Cache: Improving WordPress performance and speed
  • Akismet: Preventing spam comments

Estimating the Cost Based on Your Goals

The following things must be considered for cost estimation of the website:

  • What’s the realistic budget for your website?

Building a website that you can’t afford will be a big failure. Spend on premium themes or plugins wisely. Costs must be always as low as possible when you’re a beginner.

  • Do you need a custom-built website?

For the easiest way to roll out a new website, a pre-built WordPress theme must be installed. There is no need to hire a WordPress developer if you want to save money.

A custom WordPress theme is needed for giving a unique look and feel to your website. For an hour it varies from $20 to $100 an hour for hiring a developer or you can also try it yourself. Say thanks to the self-paced courses online.

  • What features will you need?

At the start, you won’t get more appreciation like other top websites that you see on the internet. It is important to list down all the features at the start, even if you start small. It also helps us to make sure that the total development process is aligned properly and high priority features must be focused on. The cost can also be minimized as the site grows due to less need for initial development costs.

Not only a beginner or an intermediate developer, a web agency also follows some of the above-mentioned rules to save money while processing an order. 

So, above were some of the insights we wished to provide you. Let us know how helpful they were for you in your Website Development process.